Interesting Tech Projects
CNC

Rendering 3D Models
Jun 23rd
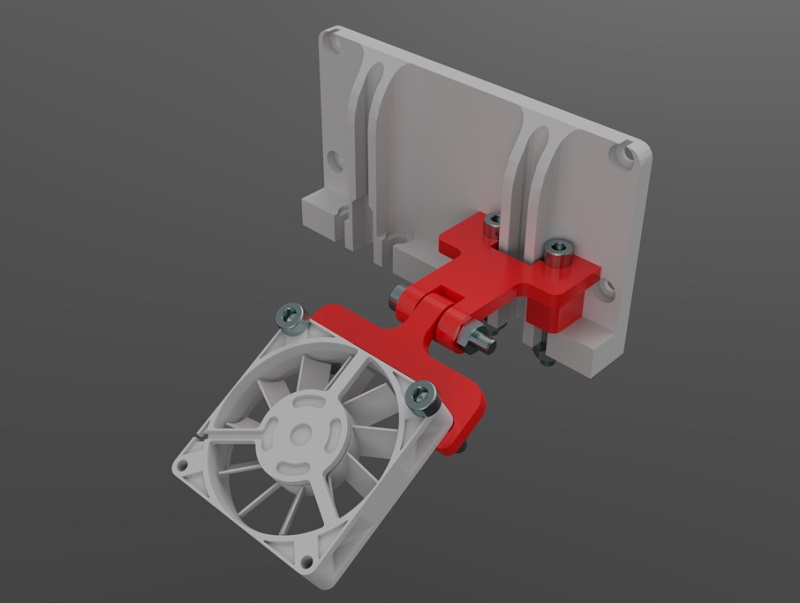
Rendering models using a variety of materials allows a finished object to be viewed and analyzed before committing to cutting wood or printing plastic. SimLab Composer works very well with Alibre Design. Here is an example showing my fan mount for the current RepRapPro Mendel design:
The nozzle mount is an STL from RepRapPro. The fan is an IGES file from GrabCAD. The M3 nuts and bolts are STLs from TraceParts. Finally the fan mount was exported as 3D PDF from Alibre Design.
Rendering of a CNC Machine
Dec 29th
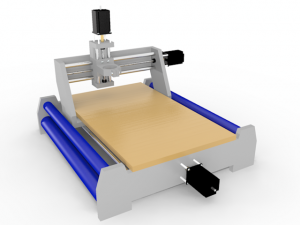
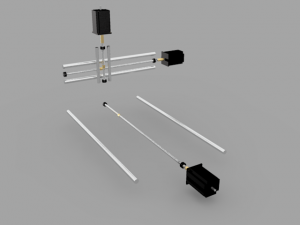
In preparation for a long term project I am working on I created a 3D model of a 3-axis CNC machine in Google Sketchup and rendered it in Kerkythea.
This took quite a bit of tweaking to get exactly the look that I wanted, which is the appearance of the CNC machine inside a large light tent, reducing shadows and a distracting background. I.e. the typical look used for product photos.
Ridgid R2400 Router
Dec 10th
I have made Christmas presents for this year, so now it’s time for some upgrades to my CNC machine. The first upgrade is to replace my poor Dremel with a small router.
Small palm routers or laminate routers are typically around 3lb in weight, which is small enough to fit on my hobby CNC machine. I liked the DeWalt laminate trimmer, but it doesn’t have variable speed built in. Next choice was the Bosch Colt, but I have heard some stories of how several hours of use can melt the plastic around the bearings, ruining them. My final selection was the Ridgid R2400 laminate router. Nothing but praise and easy to mount.
Note that the R2401 is quite different (and heavier) than the R2400. It seems that places like Home Depot and Lowes now stock the R2401 instead of the R2400.
A big reason for replacing the Dremel with a router is better performance under load and larger shank size. Larger bit = faster and deeper cutting. My Dremel has run for probably over 130 hours on my CNC machine and it’s showing the signs. It can still cut accurately but there is now a problem with the power, and it is starting to become a bit unreliable.
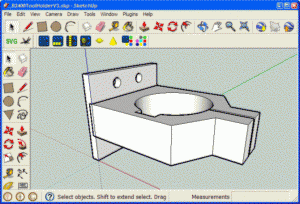
The first problem is how to mount the R2400 to my CNC machine. The solution I came up with is to press my Dremel into service one last time to cut some 1/4″ MDF. I will sandwich the parts together to create a holder that is 1″ thick with a back plate of 1/2″
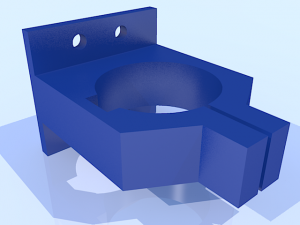
The design was done in Google Sketchup:
I then rendered it in Kerkythea for fun:
Now to start cutting…
Coaster Sets Made Using CNC
Mar 21st
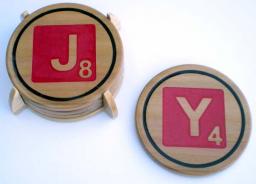
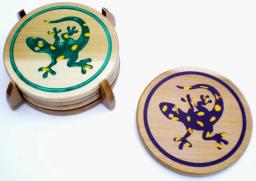
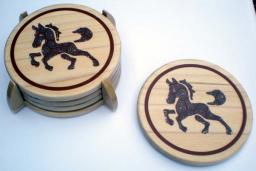
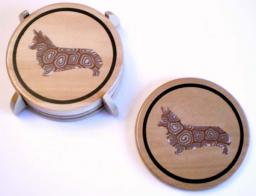
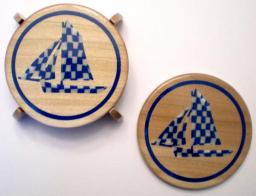
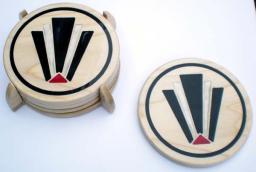
For Christmas 2008 I made coaster sets as gifts. I took pictures at the time but only now am I getting around to uploading them. I hope they provide inspiration for someone else. If the subject matter for the coasters seems a bit odd or random, it’s because most of them were designs intended specifically for the people they were given to.
Each set contains four coasters and a holder and involved about seven hours of work. The wood is 1/4″ poplar. The inlay is Premo! polymer clay. The items were finished with Varathane. Cut using 1/8″ spiral upcut endmills and 0.0571″ endmills. Designs were made in Solidedge 2D and the toolpaths were generated in CamBam Plus. On the bottom are thin discs of cork, glued on with Titebond II.
CNC Dust Box
Mar 21st
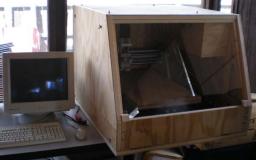
I have finally completed my dust box. Although this box is designed for the FireballCNC V90, it can fit any CNC machine the same size or smaller. Some features:
- Removable sides, top and front
- Cavities for optional sound dampening
- Reinforced floor
- Electronics storage with plenty of room for expansion
- Window on the front
- Made with easy to find materials
Some pictures are below. This will allow me to use my CNC machine in the house with people and animals around without worrying about snapped bits, sawdust, etc.
The plans for this box are now available for $15! That is a $15 donation to Top Dog, a non-profit in Tucson, Arizona, USA that helps disabled people train their own service dogs and remain independent! Donate to get the plans now!
The plans are in imperial/English units and consist of 26 pages. The inside dimensions of the box are approximately 26″W x 34″D x 23″H with the electronics storage being 7″W x 34″D x 8″H. The approximate cost to construct the box is $80 – $100, nearly all the cost of the wood. The box can be made with a table saw/circular saw and a drill. No special electric tools are required. A full parts list is included. The plans also include some hints and tips.
Fireball V90 EMC2 Configuration Files
Mar 4th
I am making my configuration files available to help anyone trying to get their Fireball V90 machine working with EMC2. The configuration is for inches, 1/4 microstepping and the HobbyCNC Pro board.
To use these files you will first need to perform the latency test and work out the base period for your PC. Open the Stepconf wizard and choose to update this configuration. Put the latency test results into the Stepconf wizard. Then you must double-check the pin configurations for your board if you are not using the same one I am. These changes are easy to make. I recommend 1/4 microstepping as it gives smooth operation without much reduction in power and speed.
Note that Stepconf will tell you that the INI file has changed since the configuration was generated. I changed the DEFAULT_VELOCITY to 0.9 so the default jogging speed is a bit faster.
Download Fireball V90 EMC2 Configuration Files.
Update: Now with Stepconf generated config files.
Two Essential Features for G-Code Generators
Oct 25th
There are a couple of features that I’ve come to the conclusion are essential, when generating g-code. Sure, there are a lot of features that are necessary, but these are features that perhaps a newcomer to CNC might overlook.
Tab Generation:
When cutting out a part from a piece of wood, there is a moment when the bit will cut through the last piece of wood holding the part to the rest of the wood. At this point the forces may cause the part to simply be forced out instead of precisely cut out. If the part is complex it is possible that this may happen even earlier in the last cutting pass, causing the wood to be snapped and the part to be damaged.
The solution is holding tabs. These are small pieces of wood that are left in place to hold the part to the rest of the wood. After cutting has finished the tabs can be broken, perhaps with a Dremel, then sanded away. This creates control over the process of removing the part, and will avoid any damage.
It is possible to manually design in the tabs when creating the part in a CAD program, but then some manipulation is required in the g-code generator to obtain the correct toolpaths. A quicker and easier solution is to use a g-code generate that can automatically generate the tabs. The usefulness of this should not be overlooked.
Lead In Moves:
Plunges, where the bit is moved vertically into the wood, put a lot of strain on the CNC machine and the spindle. For example on my CNC machine I can sometimes see the Z-axis assembly move slightly up and back when it encounters the resistance of the wood.
The solution is to use lead in moves. These are moves that gradually move the bit vertically into the wood at an angle or from the side. This reduces the stress on the mechanical components, which should last longer. As an example for my current projects I use a lead in move of seven degrees.
Introduction to End Mills
Sep 23rd
The best introduction I have found is from the Enco catalog. Fortunately you can view the catalog online. The introduction covers materials, types, number of flutes (including the trade offs), end cut type, shank type and surface treatments.
View the introduction at:
http://www.use-enco.com/CGI/INPDFF?PMPAGE=123
Note that this gives you page 123. Enco’s next release of the catalog may change the location of this introduction to another page. If you see this link is out of date please let me know the new page number.
CNC Cutting Speeds II
Sep 15th
Recently I wrote about the steps I took to reduce the cutting time of a particular part from 67 minutes down to 20 minutes. I have now purchased a couple of 1/8″ four flute endmills from Enco.
I can now cut the 1/8″ wide groove in the design, plus the outer profile with holding tabs much more quickly. In addition I can use the 1/8″ bit to perform a quick roughing pass on the pocket operation. Once complete I switch to the 0.0571″ endmill and make a finishing pass around the edges of the pocket, increasing the detail.
The new time, including the manual tool change, is about 10 minutes. Not bad. At the end of the cutting process the motors, stepper driver chips, transformer and dremel are all a lot cooler.
One small downside is that the 1/8″ bit make a lot of noise.
More On Inkscape and DXF Export
Sep 15th
Previously I wrote about a DXF exporter for Inkscape. Bob has updated his Better DXF Output exporter for Inkscape 0.46. All the files are now in one place and it is under the GPL v2 license. This is great news for CNC users and I hope it leads to more use for this handy Inkscape extension!
